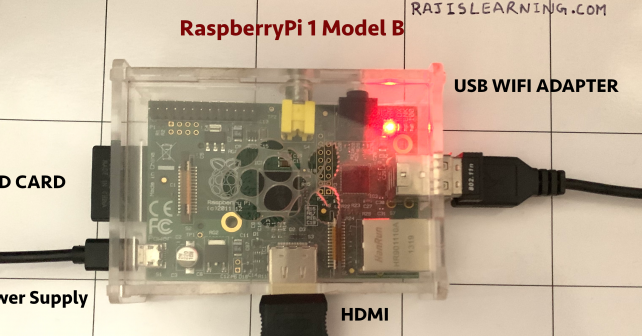
I have bought a bunch of RaspberryPis since its launch in 2013 and used them in various projects, recently I decided to re-use my old raspberryPi which is “RaspberryPi 1 model B”. It comes with ethernet connection but no wifi. I realised that a lot has been changed since I last setup this device seven years ago and it is not a straight forward setup, especially when we are using a wifi adapter. There are three main parts of the setup that need to be done:
- Set up the RaspberryPI OS
- Set up the Wifi Adapter
- Setup the wifi Network
1. Setup the OS for RaspberryPi 1 Model B
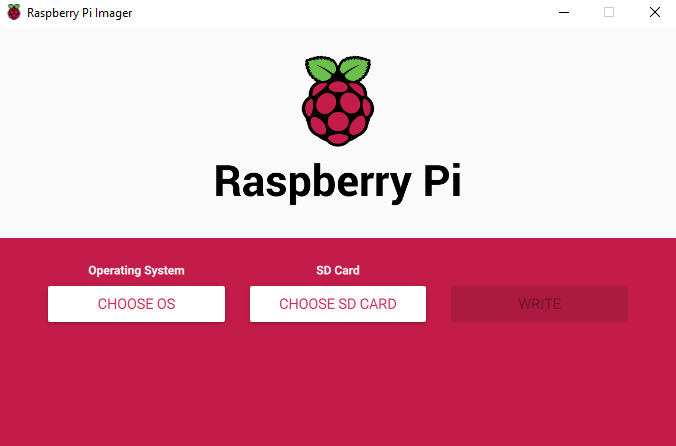
We need to prepare the SD card with the desired OS, RaspberryPi foundation has created an easy to use tool called Raspberrypi Imager to prepare the SD card. We can download it from the official site here . Once installed, run it and it will show the below screen:
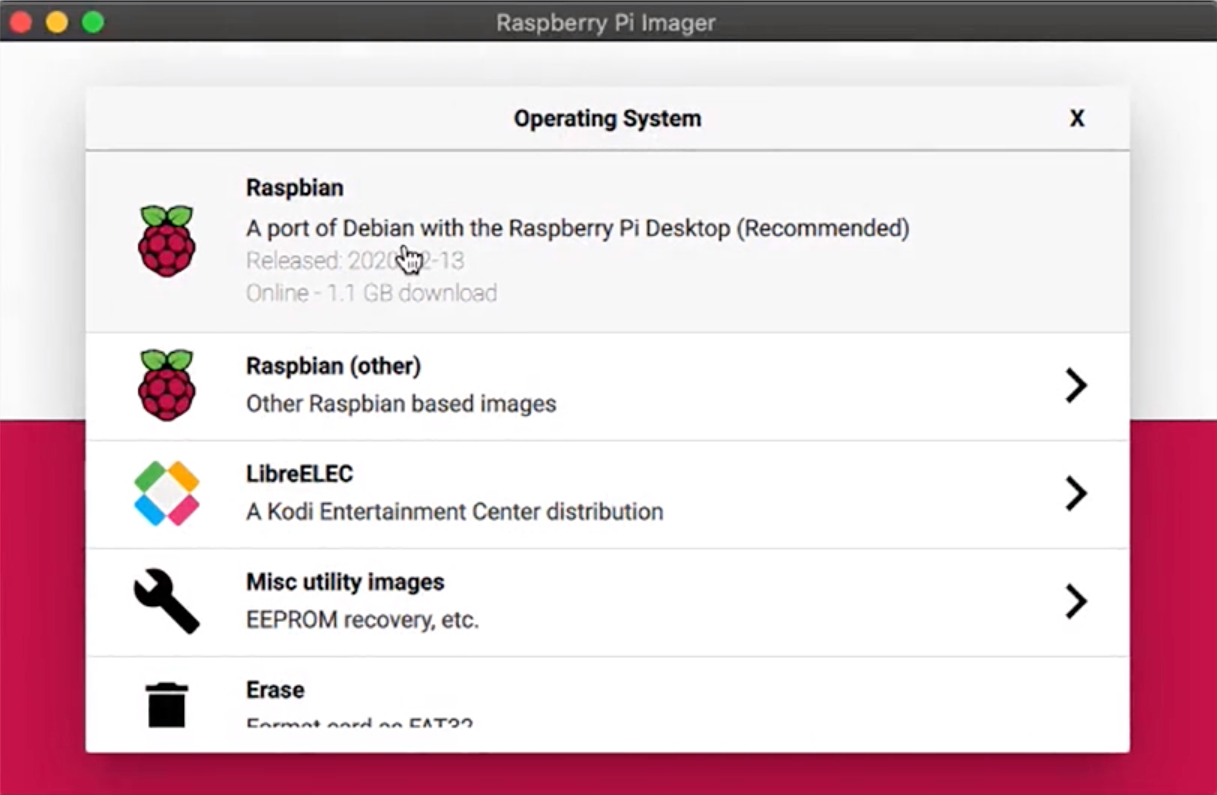
Select the OS you want to write on the sd card
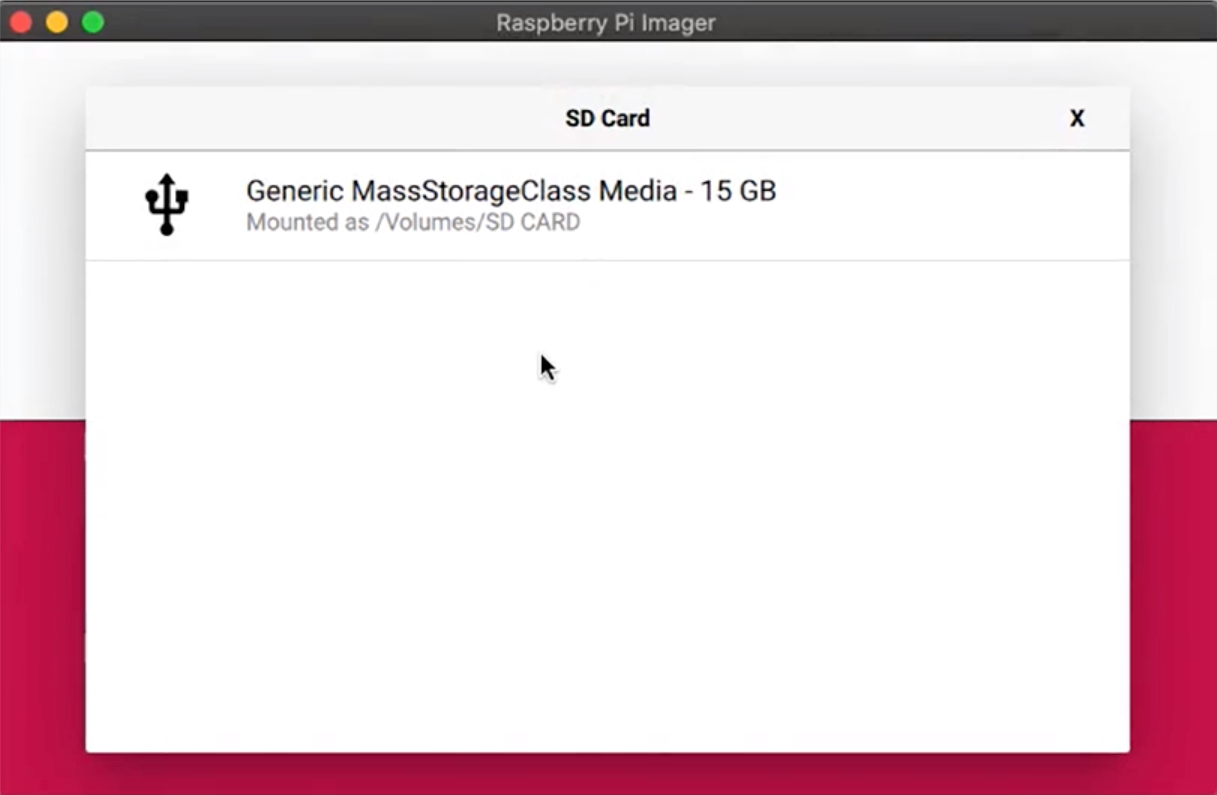
Connect the SD card via a card reader and Select the SD card in the imager. We are using a 16 GB SD card
Select “write” and this will write the selected OS on the SD card, imager will also verify the written OS image

Once done, remove the SD card from the card reader and insert the SD card into the raspberrypi. Connect the monitor, keyboard and the wifi adapter and start the boot process by connecting power supply.
It will take a little while for the RaspberryPi to start. The default user name and password is pi/raspberry. Input these values and access the system. There are desktop version of RaspberryPi OS are available but we have used RaspberryPI OS Lite which is a lightweight version without Desktop and it will boot up into a command line.
In the initial days we use to write setup files and place those on the SD card to configure the kernel of the OS and then later on further editing of system files for general configuration like default password change, but now all this is covered in a very easy tool which works on the command line called raspi-config, we will use this tool to do the two very essential configuration:
Change default password
run the following command to launch the configuration tool
sudo raspi-config
This will launch the command line tool
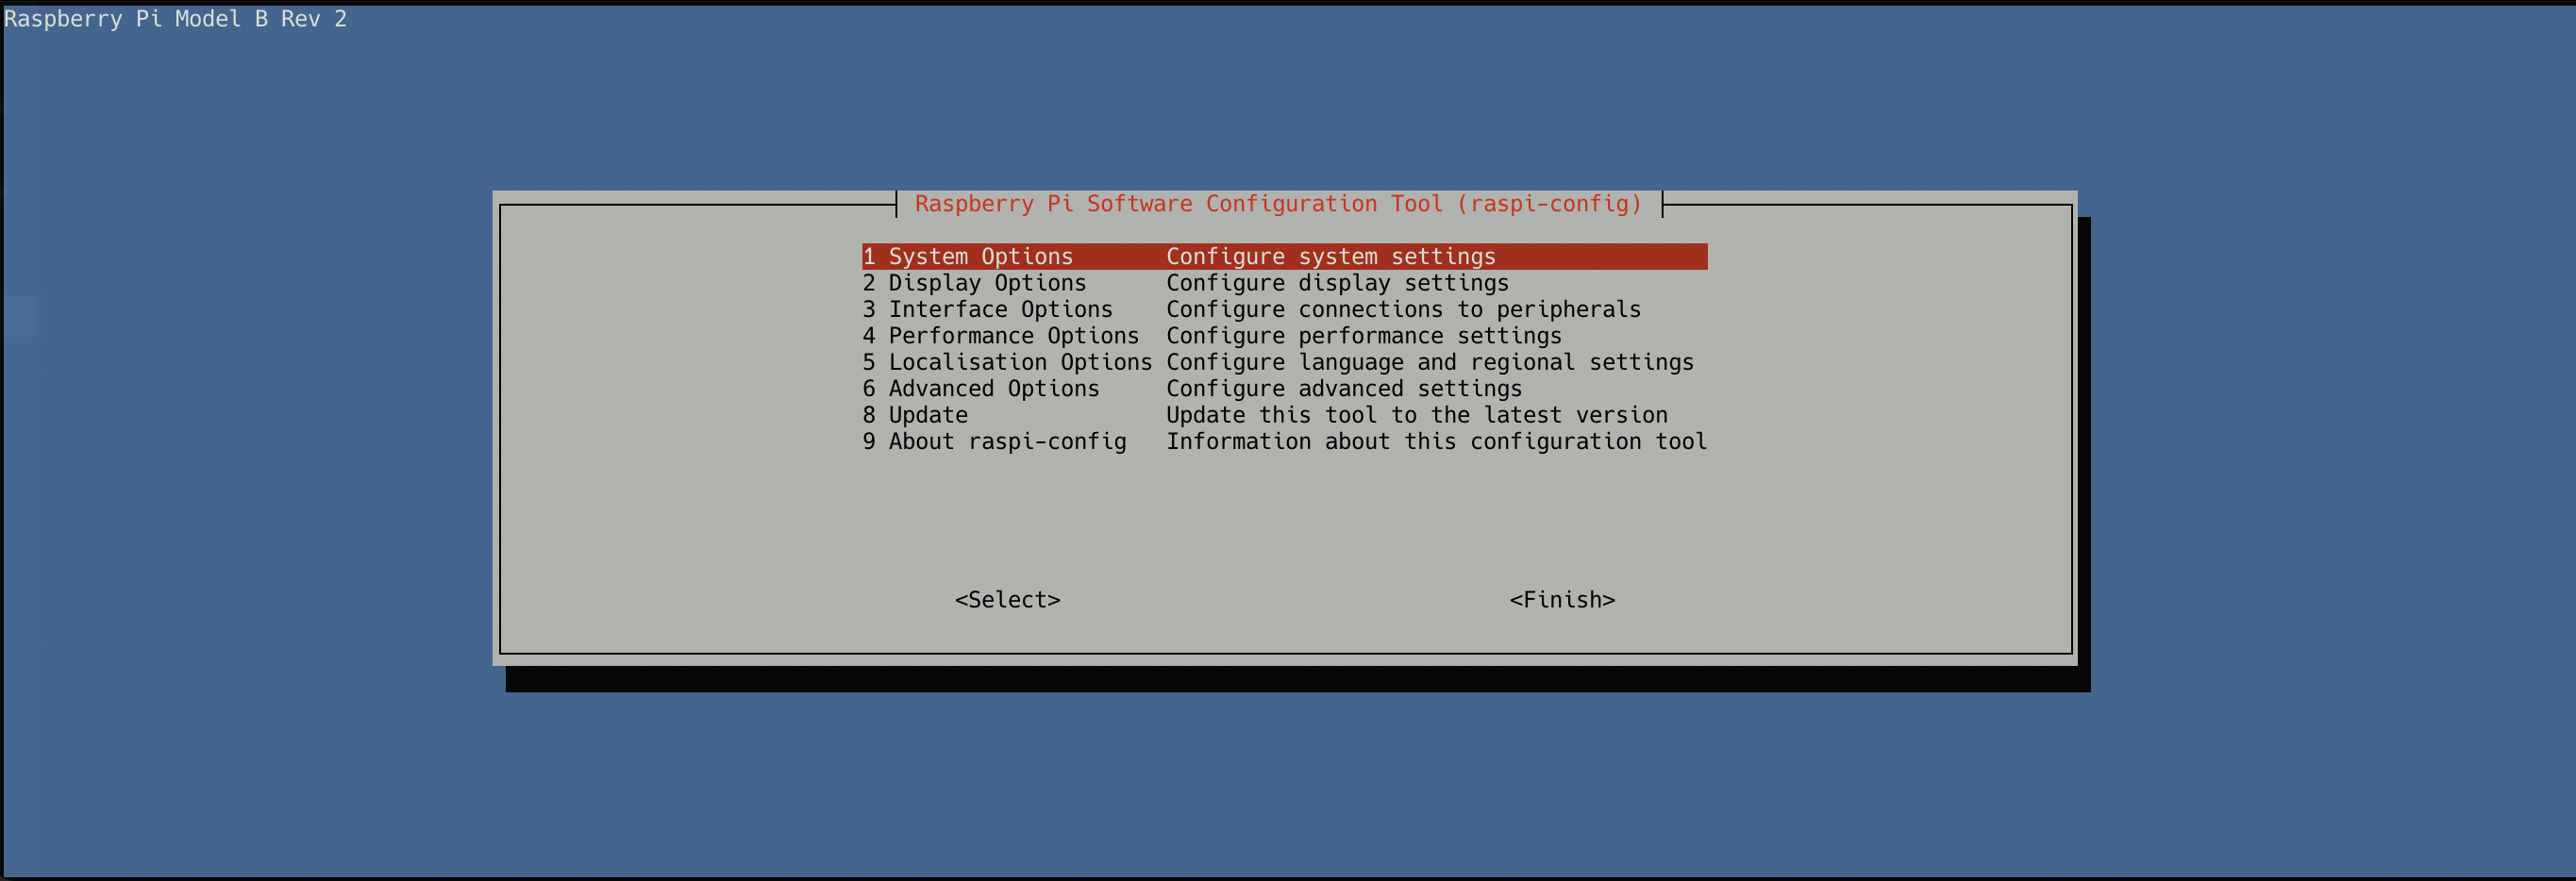
Select the “System Options” and it will show a list of system settings

select “Password” and change the default password. You can also change the hostname and can also add wireless LAN settings here, but RaspberryPi 1 Model B does not have inbuilt wifi so this option will not work.
Change Keyboard Layout
We will be editing some system files to make the wifi adapter work in the next section and a common problem that we will face is keyboard layout. By default the keyboard layout is set to “gb” which is common in UK and it will produce different special characters if you are living in other countries and using keyboards that came along with the laptops you bought from countries other than UK. To fix this we will use the raspberrypi configuration tool.
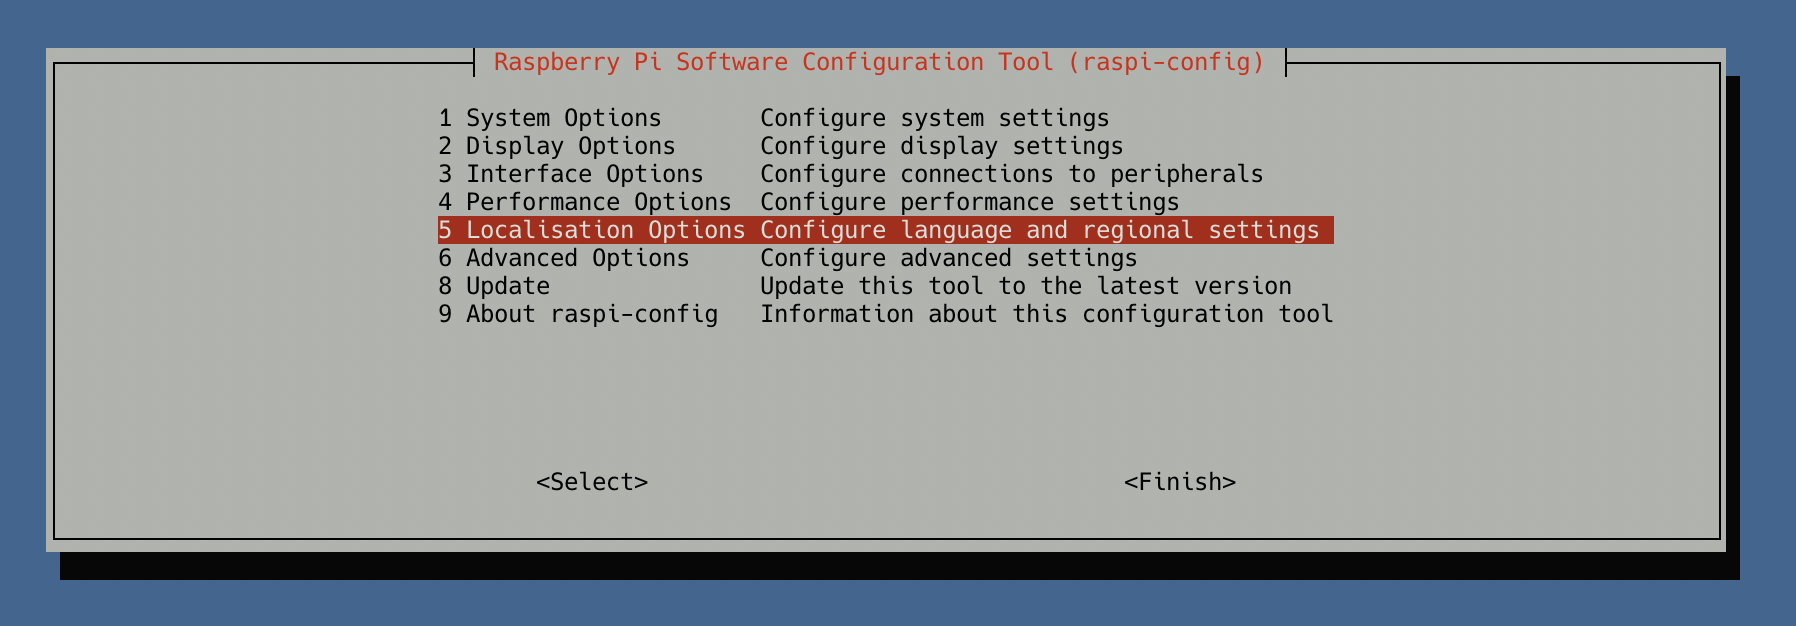
Launch the tool if it is not launched by running command sudo raspi-config and select “Localisation Options” as shown in the image below:
Select “Keyboard” option as shown in the image below
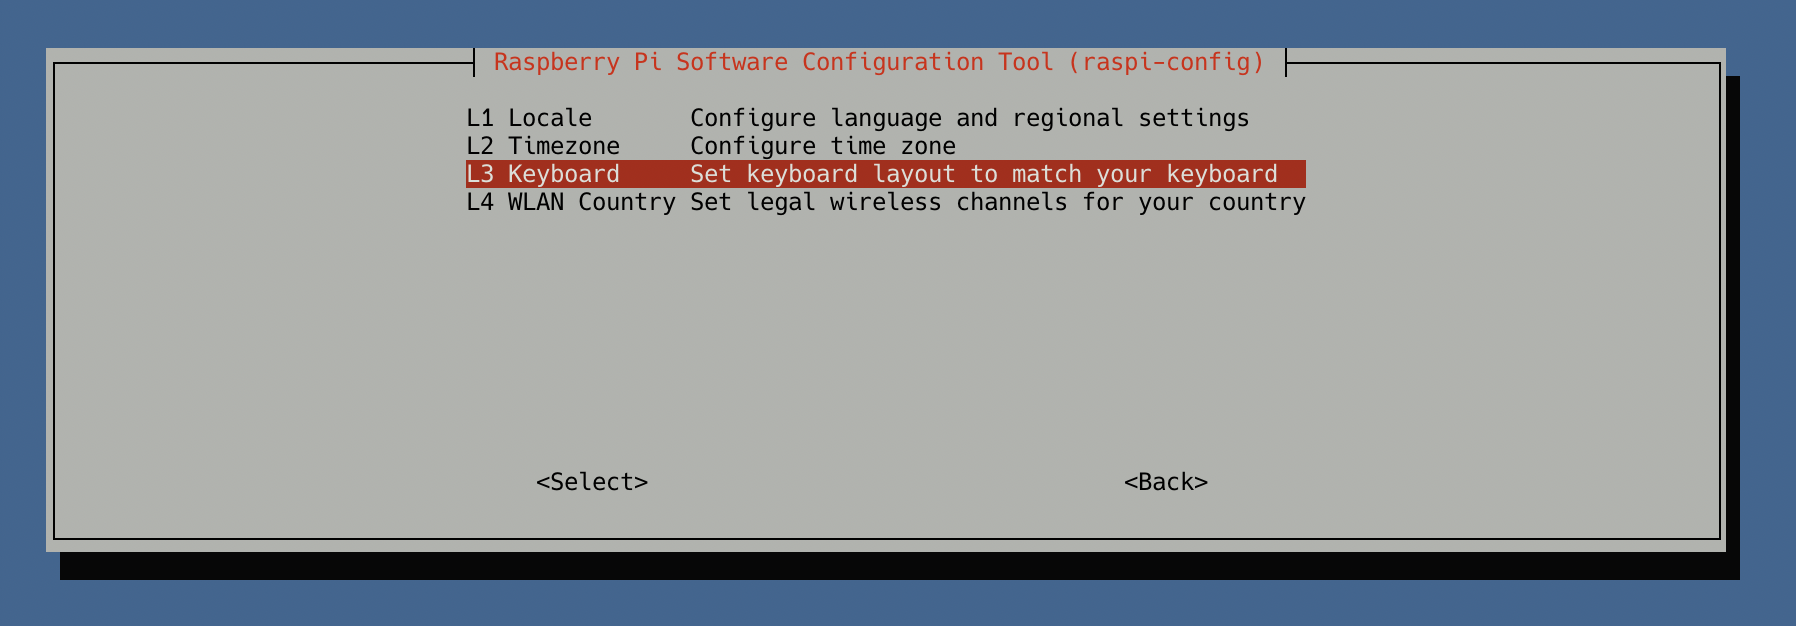
“Keyboard” option will further show you the different keyboard layout options and localisation options. I have selected “US” keyboard layout.
2. Setup the wifi Adapter for RaspberryPi 1 Model B
for this configuration we need to perform following steps:
- Check if the adapter is connected
- Disable “predictable network names”
- Update network interface
Check if adapter is connected
Make sure you are on a terminal window and run the command dmesg | more this command will open a list, press “space” for few times until you see lines containing “usb” at the start and shows your connected usb wifi adapter. My adapter is manufactured by realtek and is visible in the list as shown in the image below

Disable Predictable network names
Once we have confirmed that our usb wifi adapter is detected by the raspberryPi, we need to update another configuration. In the older versions of the debian OS, network interfaces will have names like et0 or wlan0 and any new interface will get incremental names like if we connect additional usb wifi adapter they will appear as wlan1, wlan2 etc, however in the latest version of debian OS (Raspberry Pi OS Lite is also based on debian OS) the usb wifi adapter will have interface names like wlx* which will make our wifi configuration harder to implement specially when there is no inbuilt wifi adapter and the only available adapter is usb wifi adapter.
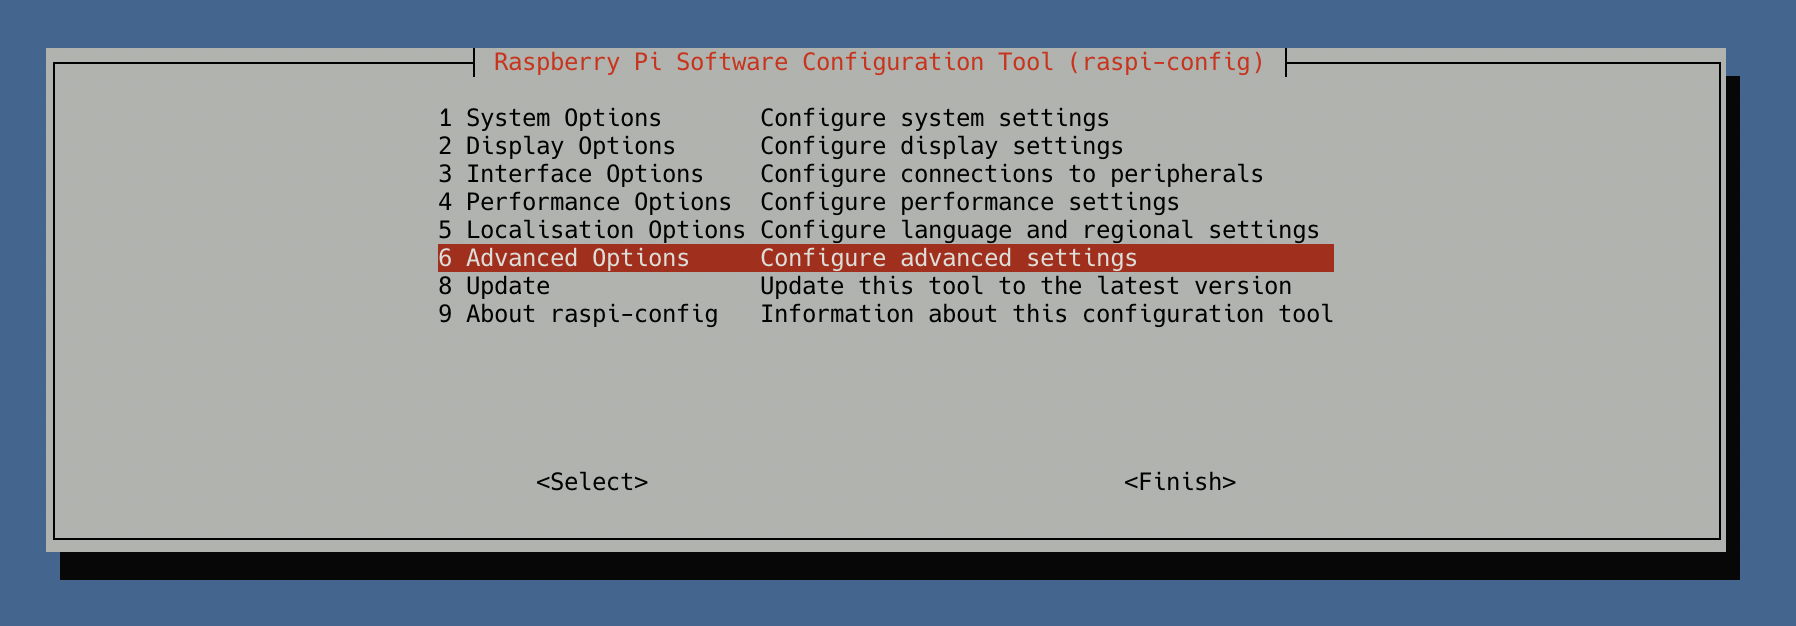
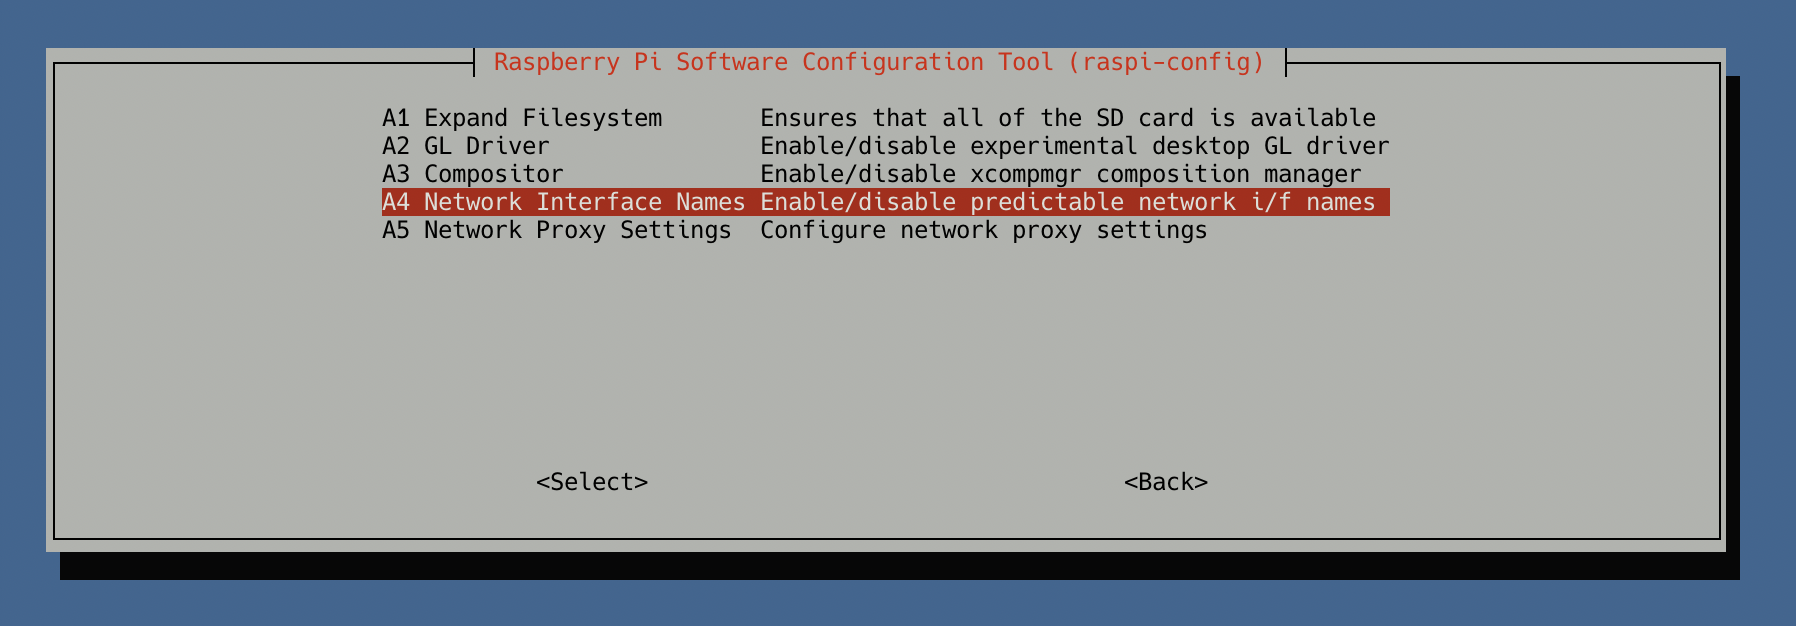
This configuration can be changed using the “raspi-config” command line tool. Launch the tool by running command sudo raspi-config and select “Advanced options” as shown in the image below
After that select “Network Interface Names” and make sure it is disabled, as shown in the image below
Update Network Interface
We need to add the wireless network interface to the interfaces file. As the RaspberryPi 1 Model B has no inbuilt wifi so our usb wifi adapter interface will become wlan0. Open the interface file by running the command sudo nano /etc/network/interfaces
Add the following lines at the end of the file:
auto lo
iface lo inet loopback
iface eth0 inet manual
#auto wlan0
allow-hotplug wlan0
iface wlan0 inet manual
wpa-roam /etc/wpa_supplicant/wpa_supplicant.conf
Once added your file will look like the image below

3. Setup Wifi network for RaspberryPi 1 Model B
To setup the wifi network we need to update the “wpa supplicant” file. I am using a quick shortcut to save the wifi password in plain text but I will recommend encrypted password by using the “wpa_passphrase” utility. There is a great stackoverflow answer here explaining how to use this utility.
Now here is the shortcut method, open the wpa_supplicant file by running the command sudo nano /etc/wpa_supplicant/wpa_supplicant.conf and add the following code (update the ssid and psk with the real values as per your wifi network).
network={
ssid=”Name of WiFi Network”
psk=”Password of the WiFi Network”
proto=RSN
key_mgmt=WPA-PSK
pairwise=CCMP TKIP
group=CCMP TKIP
id_str=”Name of WiFi Network”
}
Save the file and turnoff the raspberrypi by running command sudo poweroff. Once powered off remove and reconnect the power and boot up the raspberrypi. After boot is completed check the network interfaces by running command ifconfig it should display the wlan0 interface and the ip address associated to it. To check the network connectivity run ping www.google.com and verify the output. Once the wifi network connection is established and internet access is confirmed make sure to update the system by running sudo apt-get update and sudo apt-get upgrade


One Response to “Reviving RaspberryPi 1 Model B in 2021 After 7 years”
September 13, 2021
PrernaHi Author…
Read your blogs and it is really impressive and instructions are really easy to follow.
Really appreciate your hard work .
Thanks once again