
We all know ads can be annoying, especially when they appear out of nowhere or appear too many times. As website owners started adding more and more ads to make more money, the users started looking at ways to block these ads. Traditional way to block ads is using a browser plugin like Ad Block Plus, which works well on single laptop but we are going to block ads on every device connected to your network by using RaspberryPi with PiHole installed on it, but before that we need to understand why we need PiHole.
Users are not just using Laptops/PCs to consume content on Internet, mobile phones and Smart TVs are quickly catching up. Ad blocking on mobile phones and Smart TVs is not as easy as laptops. Laptops use browsers like google chrome to browse internet and a browser plugin can be easily added to block ads, however mobile phones and Smart TVs use native applications built for consuming content like YouTube, Netflix etc so ad blocking is not so easy.
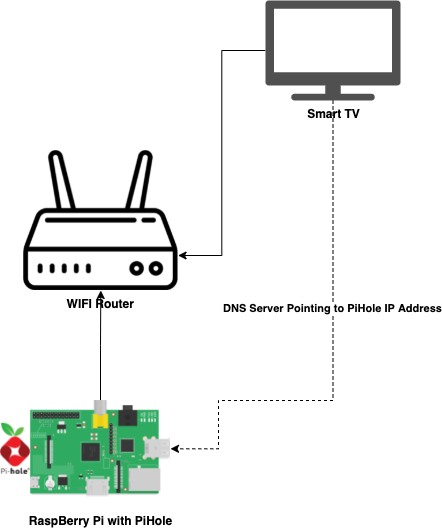
PiHole is an application which blocks ad serving domains. PiHole act as a DNS server on your network and blocks outgoing requests going to ad server domains so that we can block ads on network level as shown in the image below.
PiHole is designed to be installed on RaspberryPi but it can be installed on Ubuntu and other linux operating systems as well. For our setup we need to do following steps:
- Prepare RaspberryPI
- Install PiHole
- Configure PiHole
1. Prepare RaspberryPI
I have written a separate post which details the steps that we need to perform to install operating system and prepare the RaspberryPi. Click here to go the post. You will also find instructions on how to connect your RaspberryPi to the WiFi network as internet access is required to install PiHole in next step.
2. Install PiHole
Make sure your RaspberryPi is powered on with network configured to access internet. On the command line terminal run the following command.
curl -sSL https://install.pi-hole.net | sudo bash
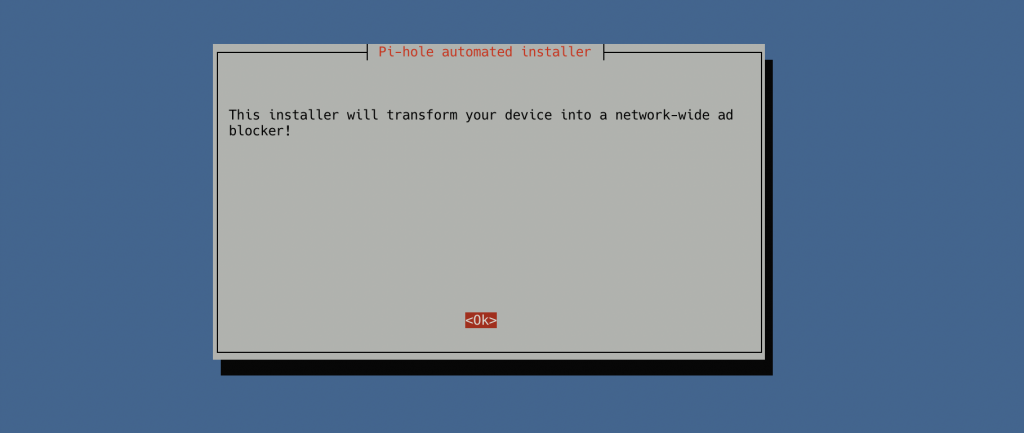
It will start the installation with ASCII art and then show the following screen.
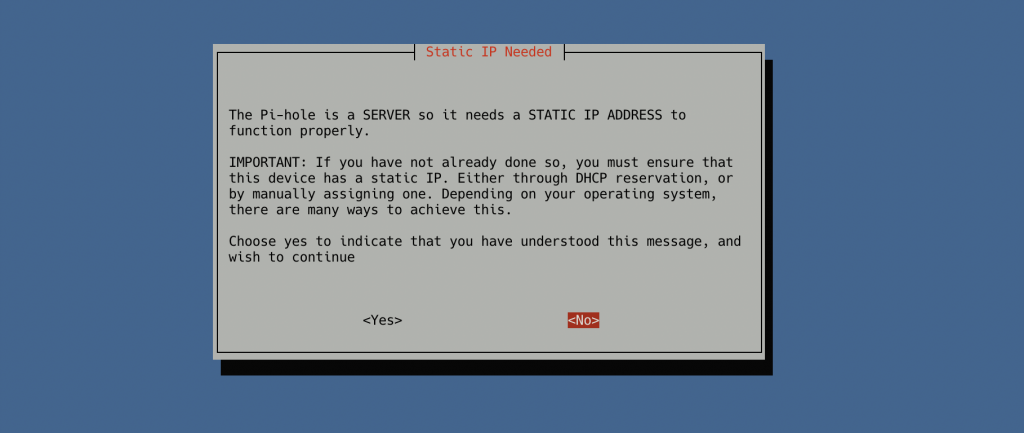
Answer “ok” to the first three screens and it will take you to the screen displaying details that PiHole can be used as a VPN and will work well if you use static IP, as shown below.
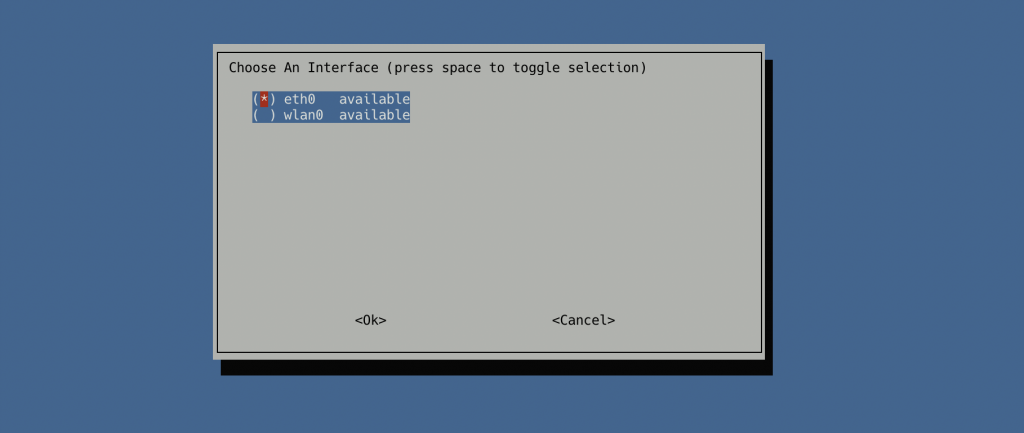
Click “Yes” and move to the next screen. It will ask you to select network interface, depending upon what you have used to connect your RaspberryPi to internet, you can select appropriate option.
Select “eth0” if you are using wired connection and select “wlan0” if you are using WiFi. Select “ok” and move to next screen. In this screen it will ask you to select a DNS provider, select “google” from the list and move to next screen.
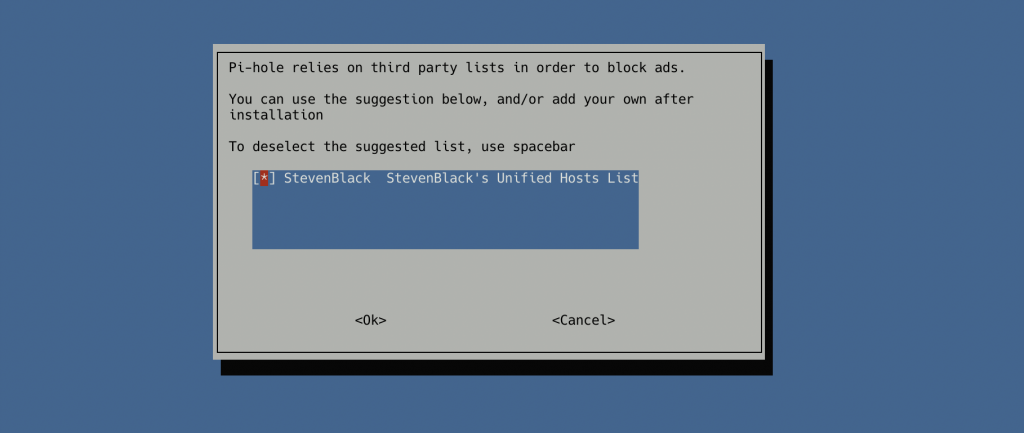
In the next screen it will show you the third party lists, these lists contain the list of ad server domains that you can block. These lists are maintained by the community members and will give you a basic configuration to block common ad servers. Select the first list as shown below.
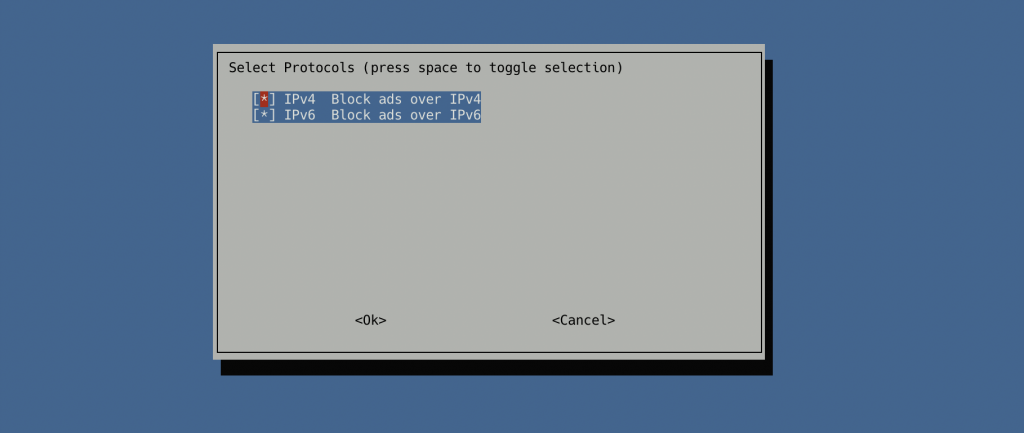
In the next screen it will ask you about IPV4 or IPV6 settings. You can decide based on your network settings or just keep it to default selection.
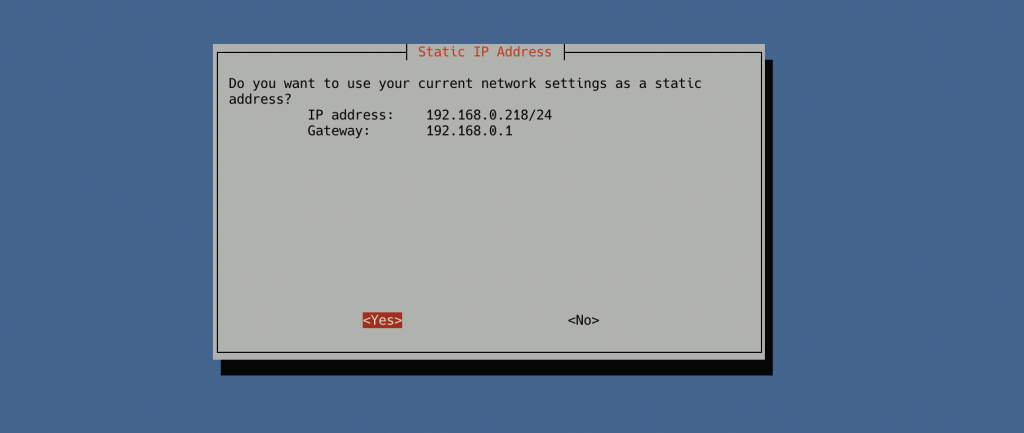
In the next screen it will show you the IP address associated with your RaspberryPi in your network and will ask you to use the same IP address. Click “Yes” as shown below.
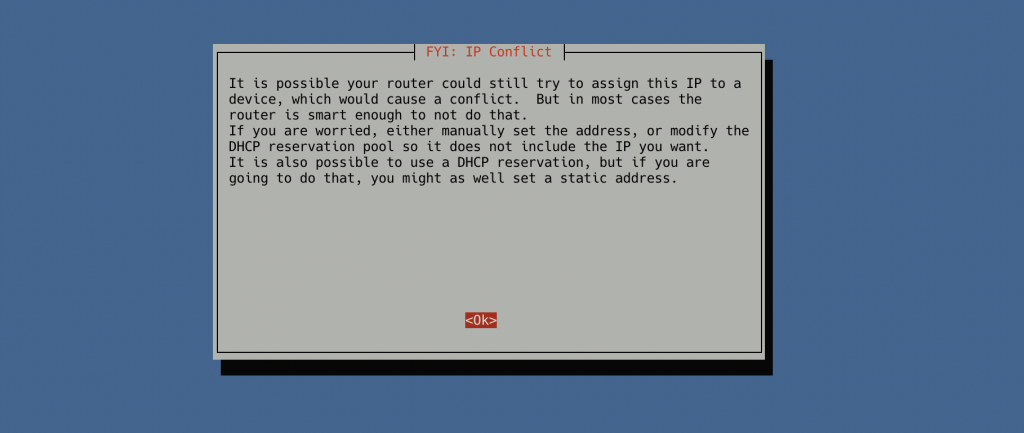
The next screen will show you a warning that your router might use the IP address selected in last step for other devices. Routers are pretty smart now days when it comes to IP handling and it will avoid the IP conflict. Click “ok” as shown below.
In the next screen it will ask you to install the web based admin panel. Select the “on” option as shown below. We will use this web based admin panel to configure the PiHole in later steps.
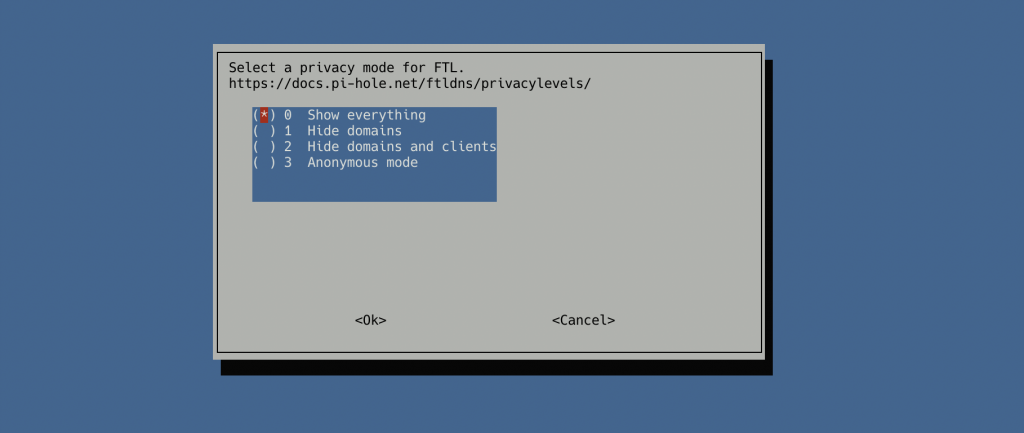
In the next screen it will ask for the privacy mode. I will recommend selecting “show everything” but this is something which we can change later as well.
There are a lot of settings and screens in the installation wizard. You can just select the default options to finish the installation and can change all these settings later after using admin panel. After installation there will be a final screen which will show you the web interface address and password for the web interface.
If you somehow miss that screen the the default url of the web interface is like http://<ip address of your raspberryPi>/admin. If you don’t know the IP address of your RaspberryPi then you can find it via “ifconfig” command.
Password is not shown again but you can reset the password by using the following command.
pihole -a -p
You will be prompted for a new password, if you enter an empty password then web interface will not require password to access it.
3. Configure RaspberryPi with PiHole
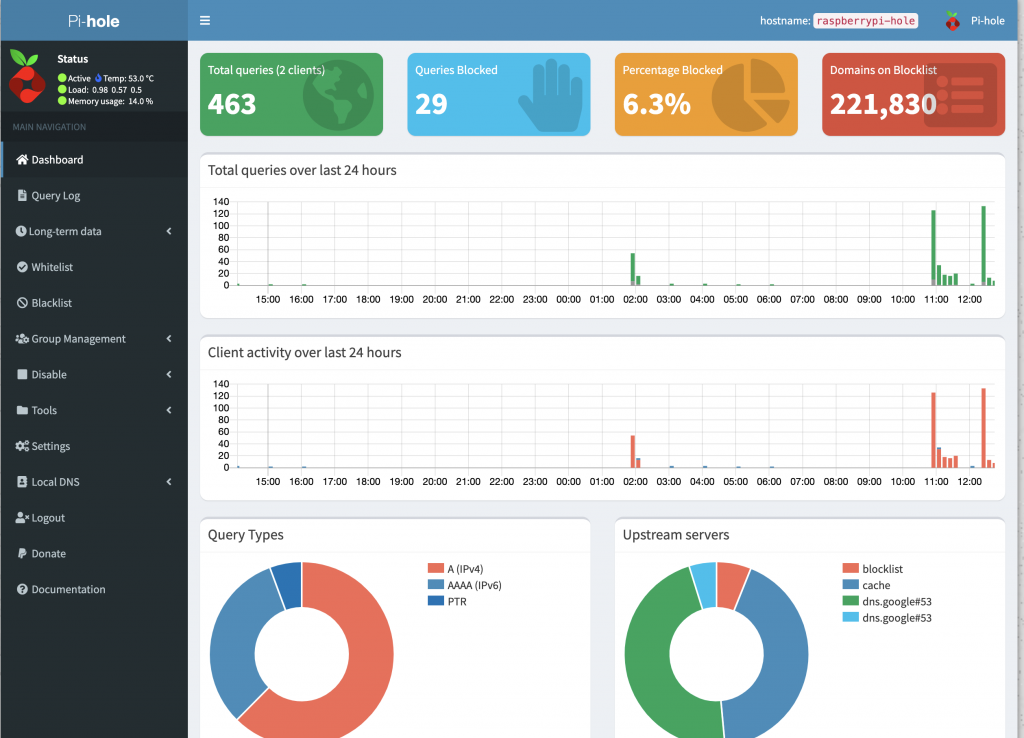
PiHole has a very rich web interface which makes it easy to configure and use PiHole. You can access the web interface by going to the url http://<ip address of your raspberryPi>/admin in my case the url is http://192.168.0.218/admin. You will see the web interface as shown below.
There are a lot of options in this dashboard and the PiHole team is actively developing it and adding more options. To know more you can read the official documentation page here.
I will discuss two main pages that we will use to configure PiHole as we use it. I have setup the PiHole as the DNS server for my Smart TV. You can setup PiHole as a common DNS server for your entire network by updating its IP in your router or you can add it to individual devices where you want to block the ads. In my case I am using it on my Smart TV. Based on the make and model of the Smart TV we need to go to the network settings and in advanced network setting update the DNS server IP address with IP address of the PiHole.
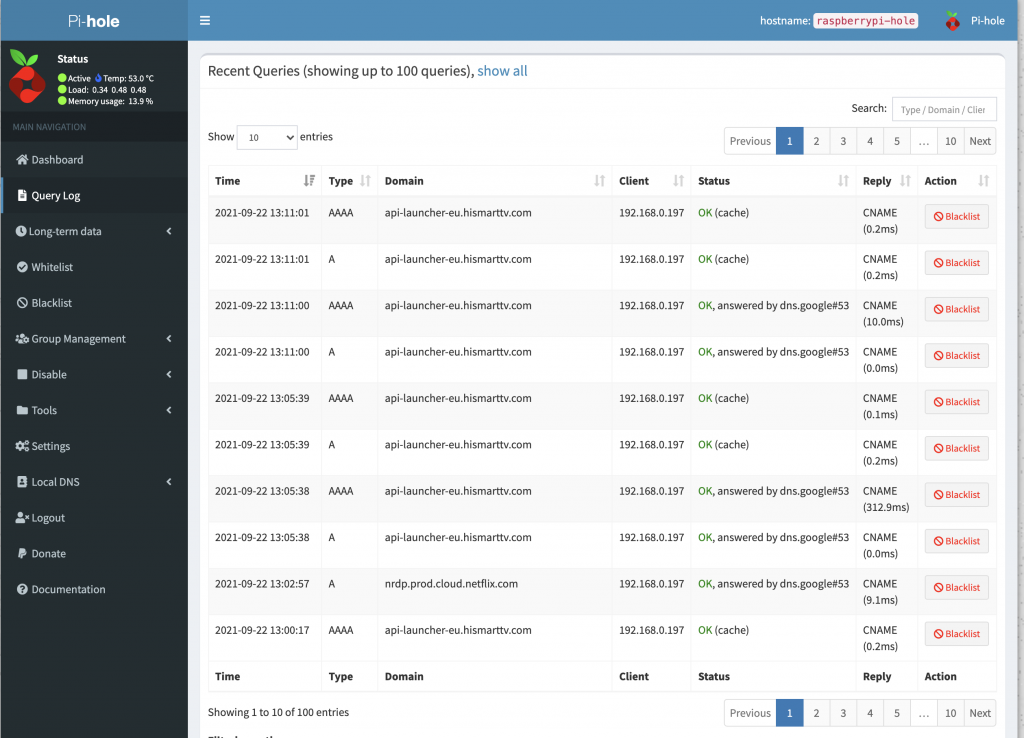
Once done if you will start using youtube or any other application on the Smart TV all the called domains will start showing up in the query log section of the PiHole web admin interface as shown below.
This screen is the first screen to identify any ad server dns called by the applications. If you identify any domain then click on “Blacklist” button and it will be blocked.
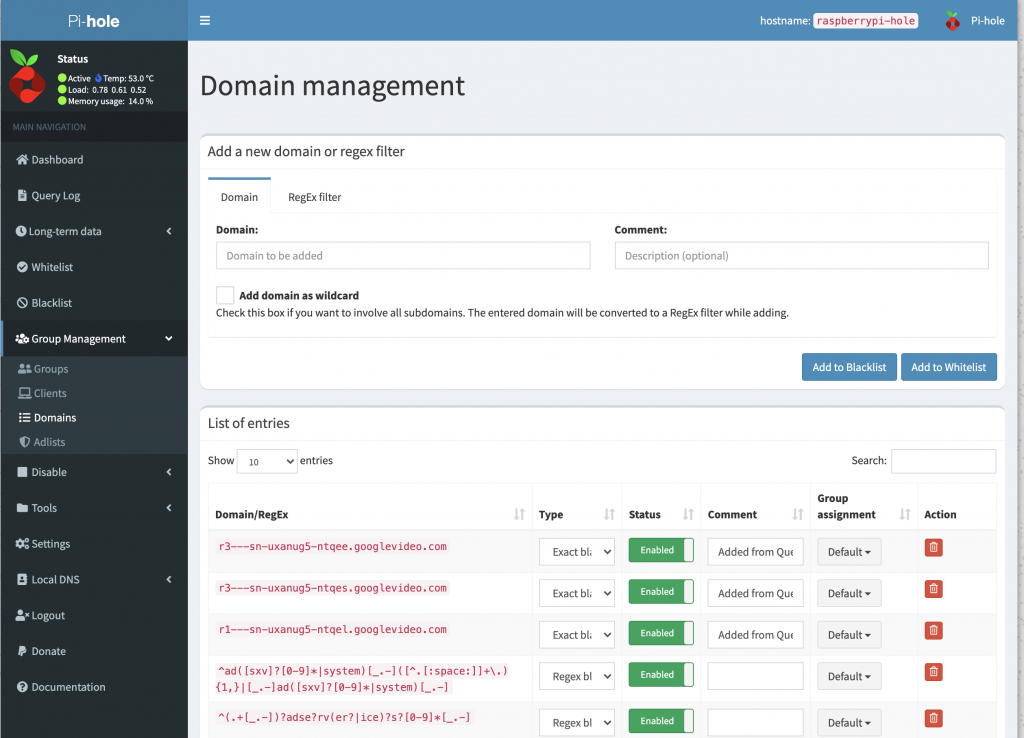
The next screen is to see the current list of blocked domain. Click on the “Group Management” link in the lft menu and the click on “Domain” and it will show you the following screen.
This is the main screen to add any additional domain to the blocked list. You can also add regular expressions to match a pattern and block all domains matching that pattern.
With this setup you will be able to block about 80% of the ads, however ad servers keeps changing their domain names to invade blocking and their are community managed blocking lists which are updated regularly to accomodate these changes you can find more details here.
Once setup and ad block lists added you can periodically update PiHole and the lists by using the following command.
sudo pihole -up
For updating blocking lists run the following command
pihole -g




2 Responses to “RaspberryPi with PiHole to block ads everywhere”
September 22, 2021
PrernaThis blog is so well explained and will update here once I apply all the steps as mentioned .. You have very easy and nice way of writing article.
Thanks and really appreciate your hard work.
November 29, 2021
Esther EmilyLoved this blog! going to try this now! thanks!